🏢 Workspace Management
What is Workspace?
The "Workspace Management" feature in FormNX allows you to create separate workspaces to organize your forms and submissions efficiently.
Each workspace can serve as a collaborative environment for specific teams membres or projects, enabling members to share and work on forms collectively.
Workspace management streamlines collaboration and data sharing within your organization or teams or partners.
Creating and Managing Workspaces
To create and manage workspaces in FormNX, follow these steps:
Creating a Workspace
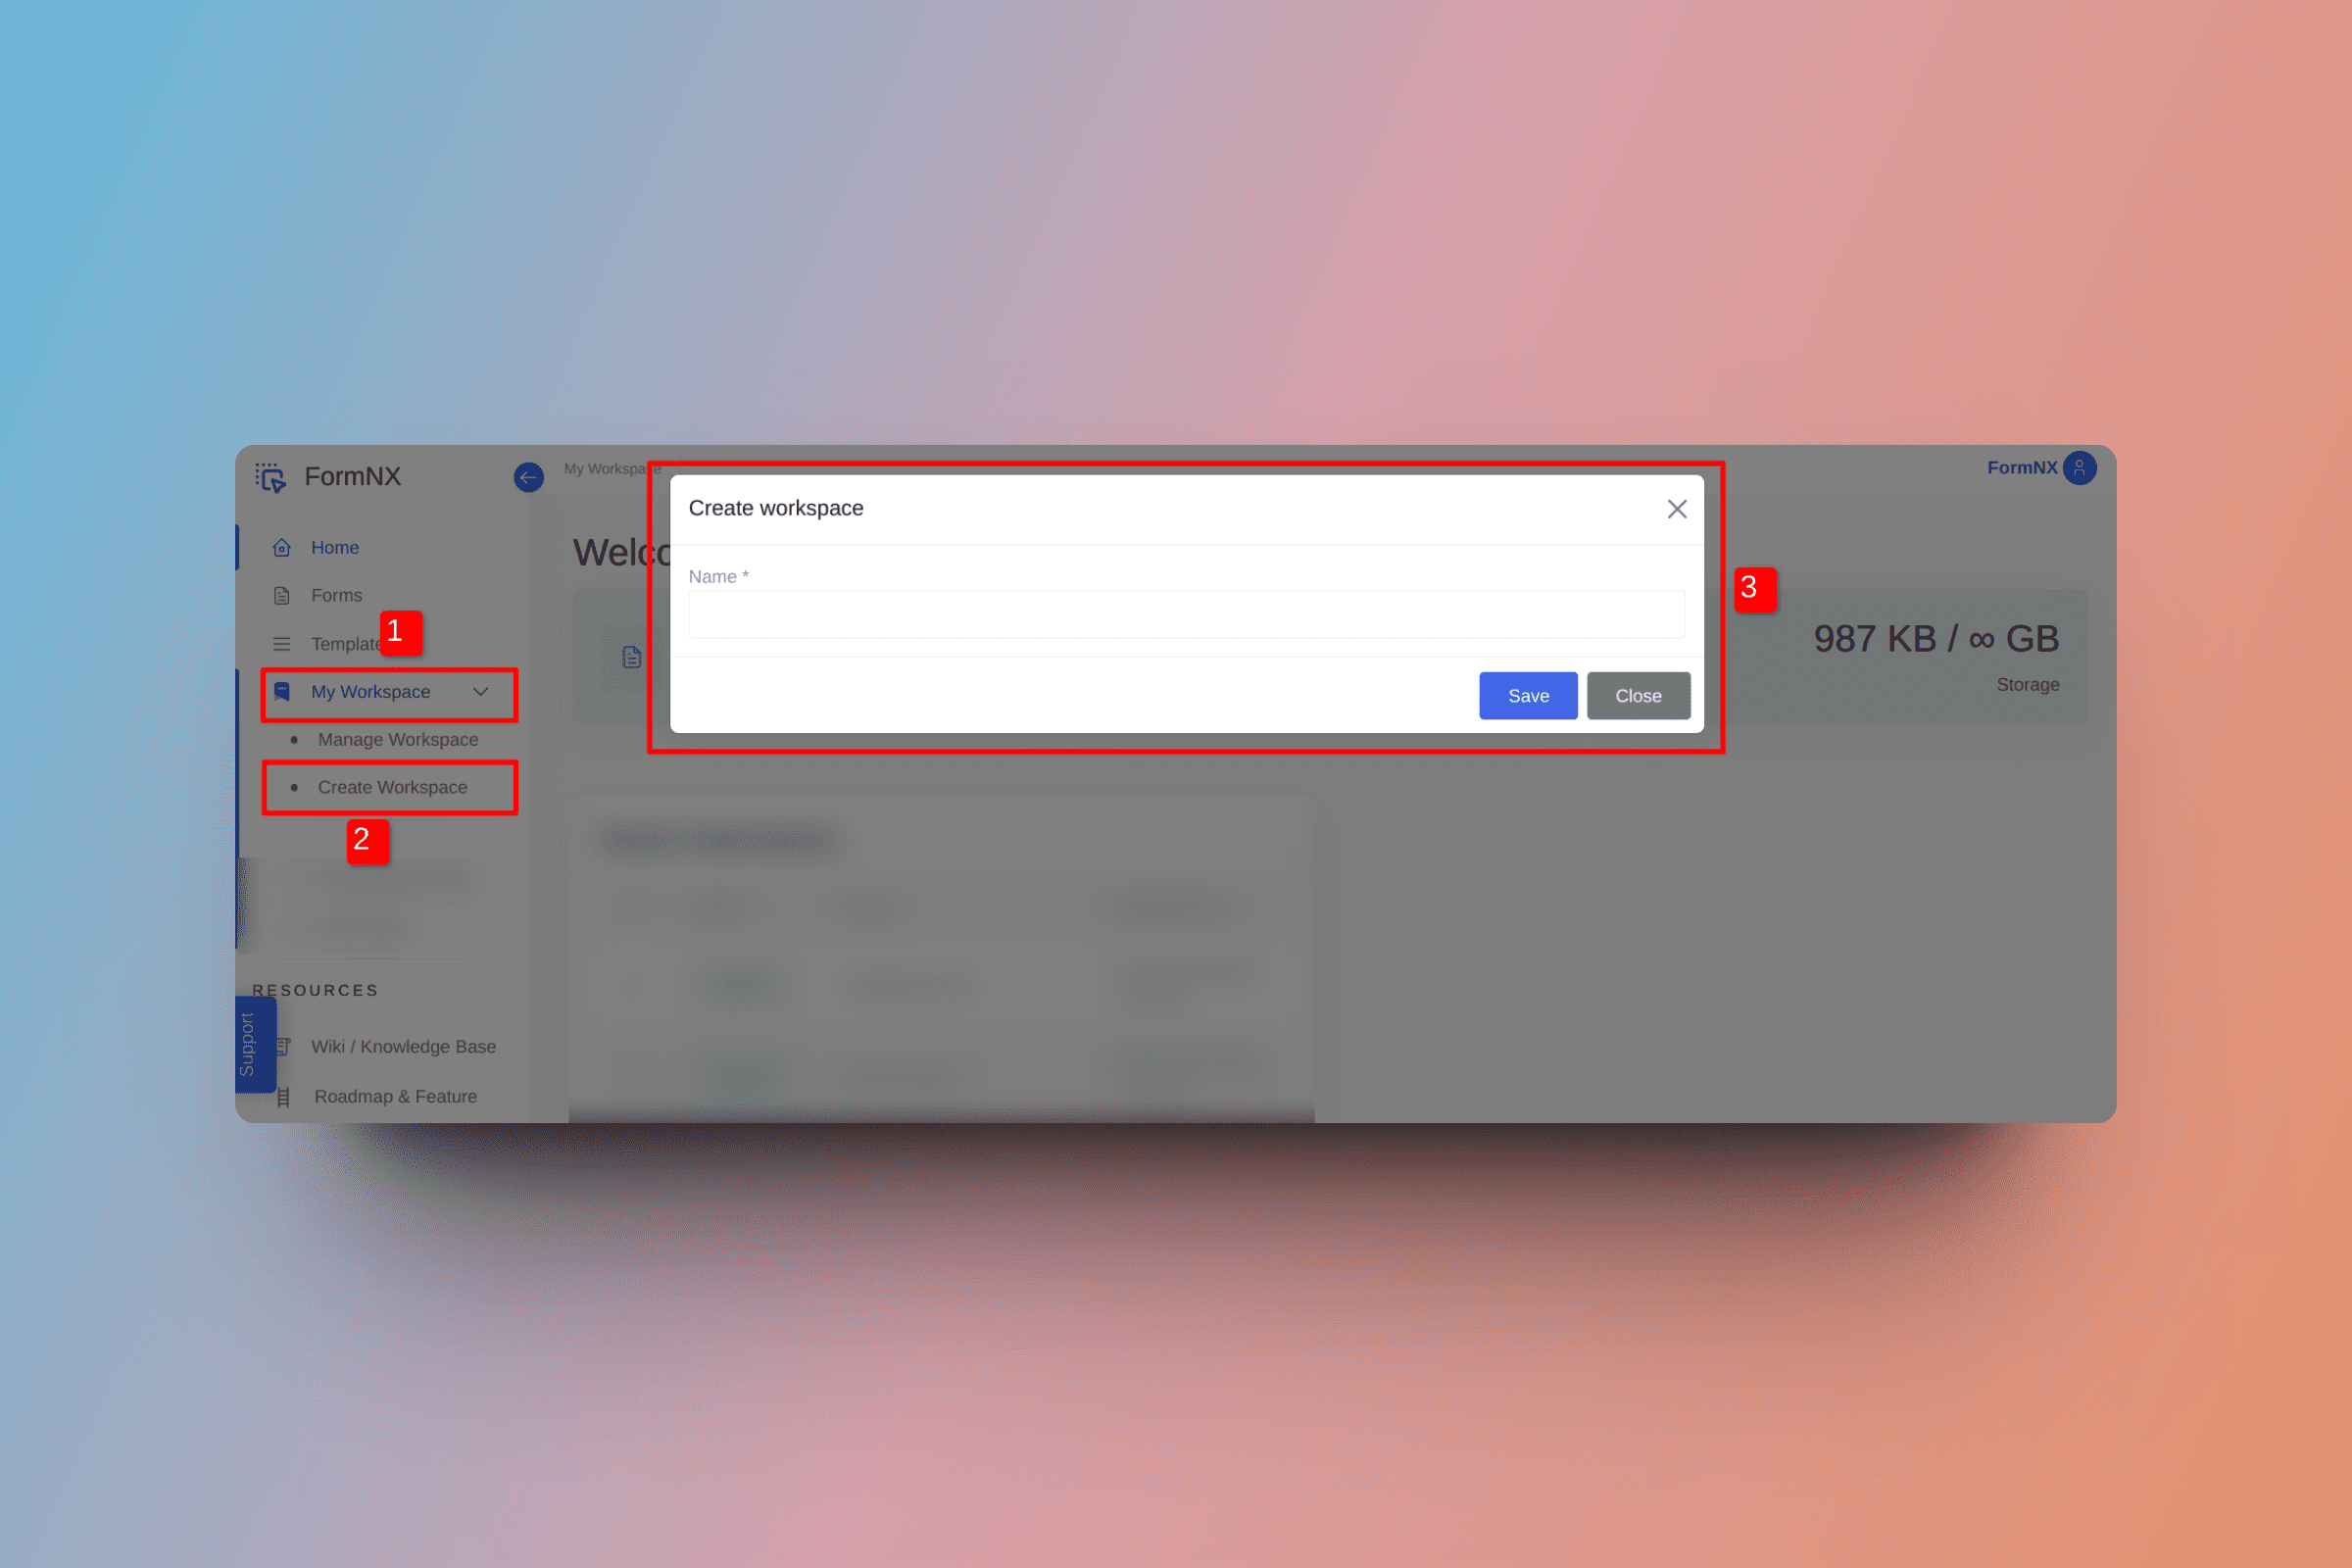
Access Workspace Management: Log in to your FormNX account and navigate to the "My Workspace" menu.
Create a New Workspace: Click on the "Create Workspace" menu.
Provide Workspace Details: Enter a name for the new workspace, and if needed, add a brief description or note to describe its purpose.
Invite Members to Workspace
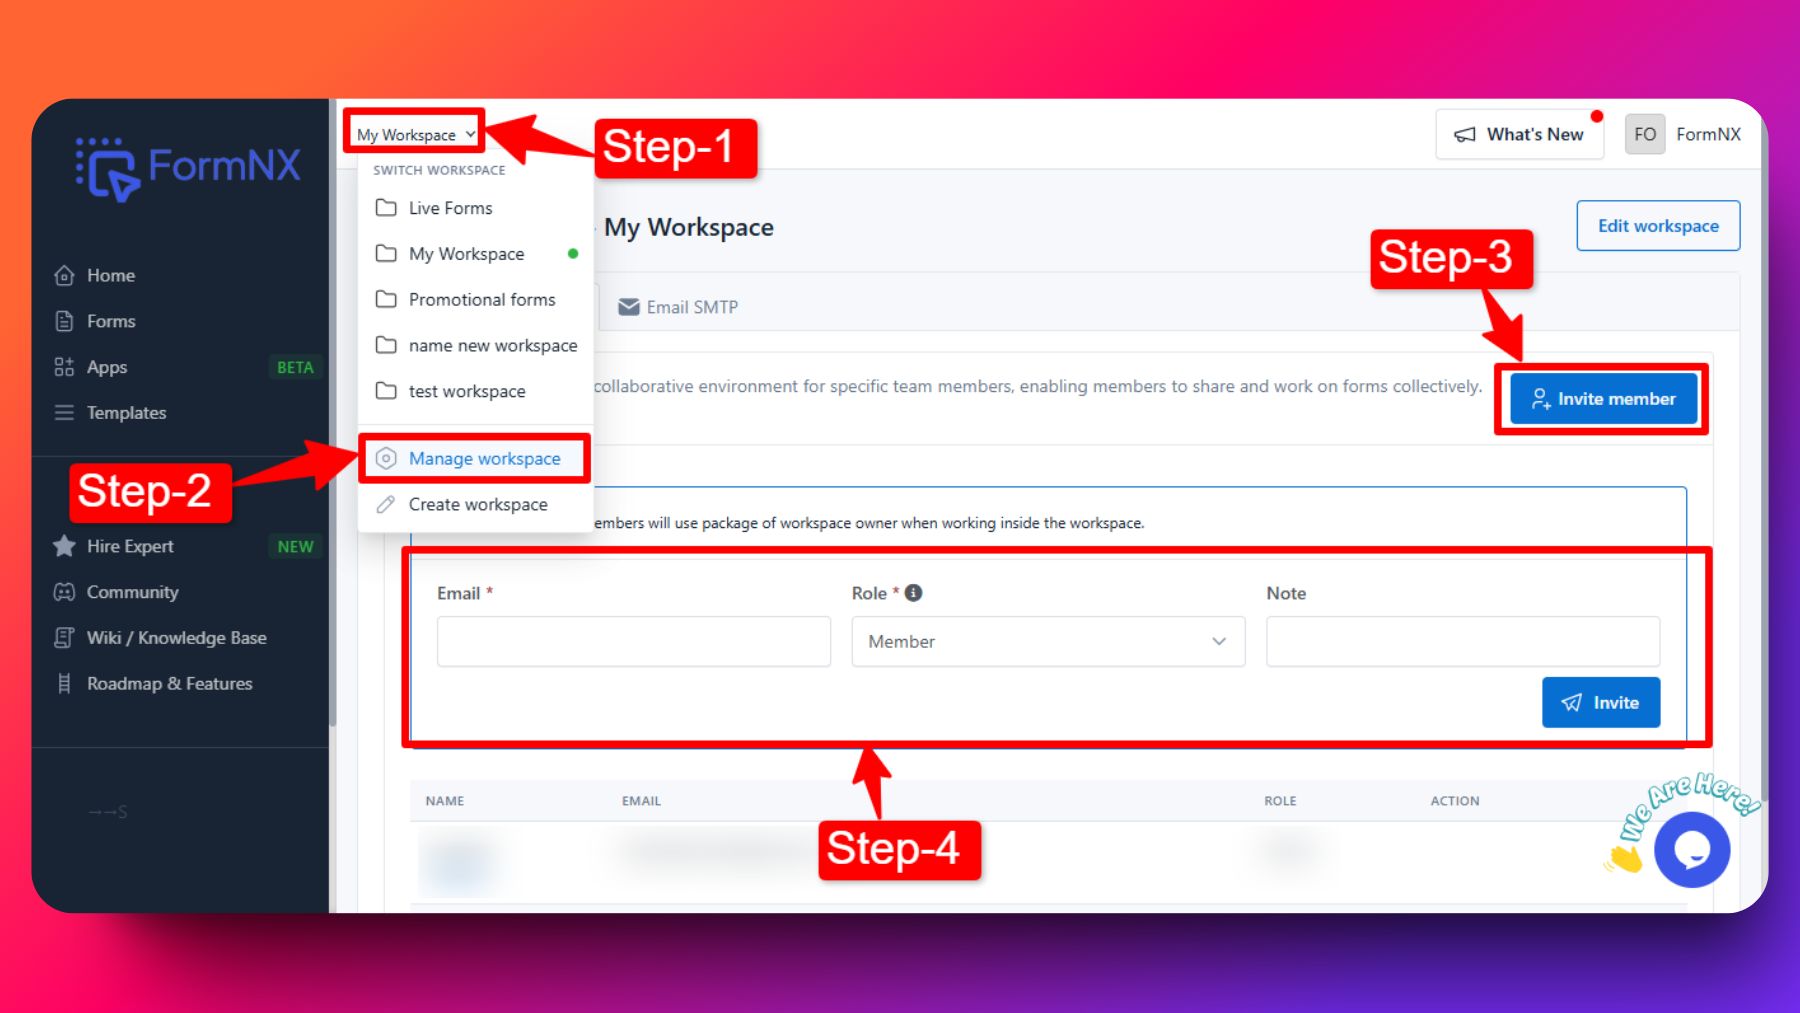
Invite members to the workspace by entering their email addresses, assigning roles (Admin, Member, Viewer) and a personal note to the invitees if desired.
Invited member will get an email having with the personal note & link to accept or reject the invitation.
Invitation Accept
Refer to the screenshots below , to know how to accept the invitation for Workspace members list:
The individual's receives an email containing a link to accept an invitation.
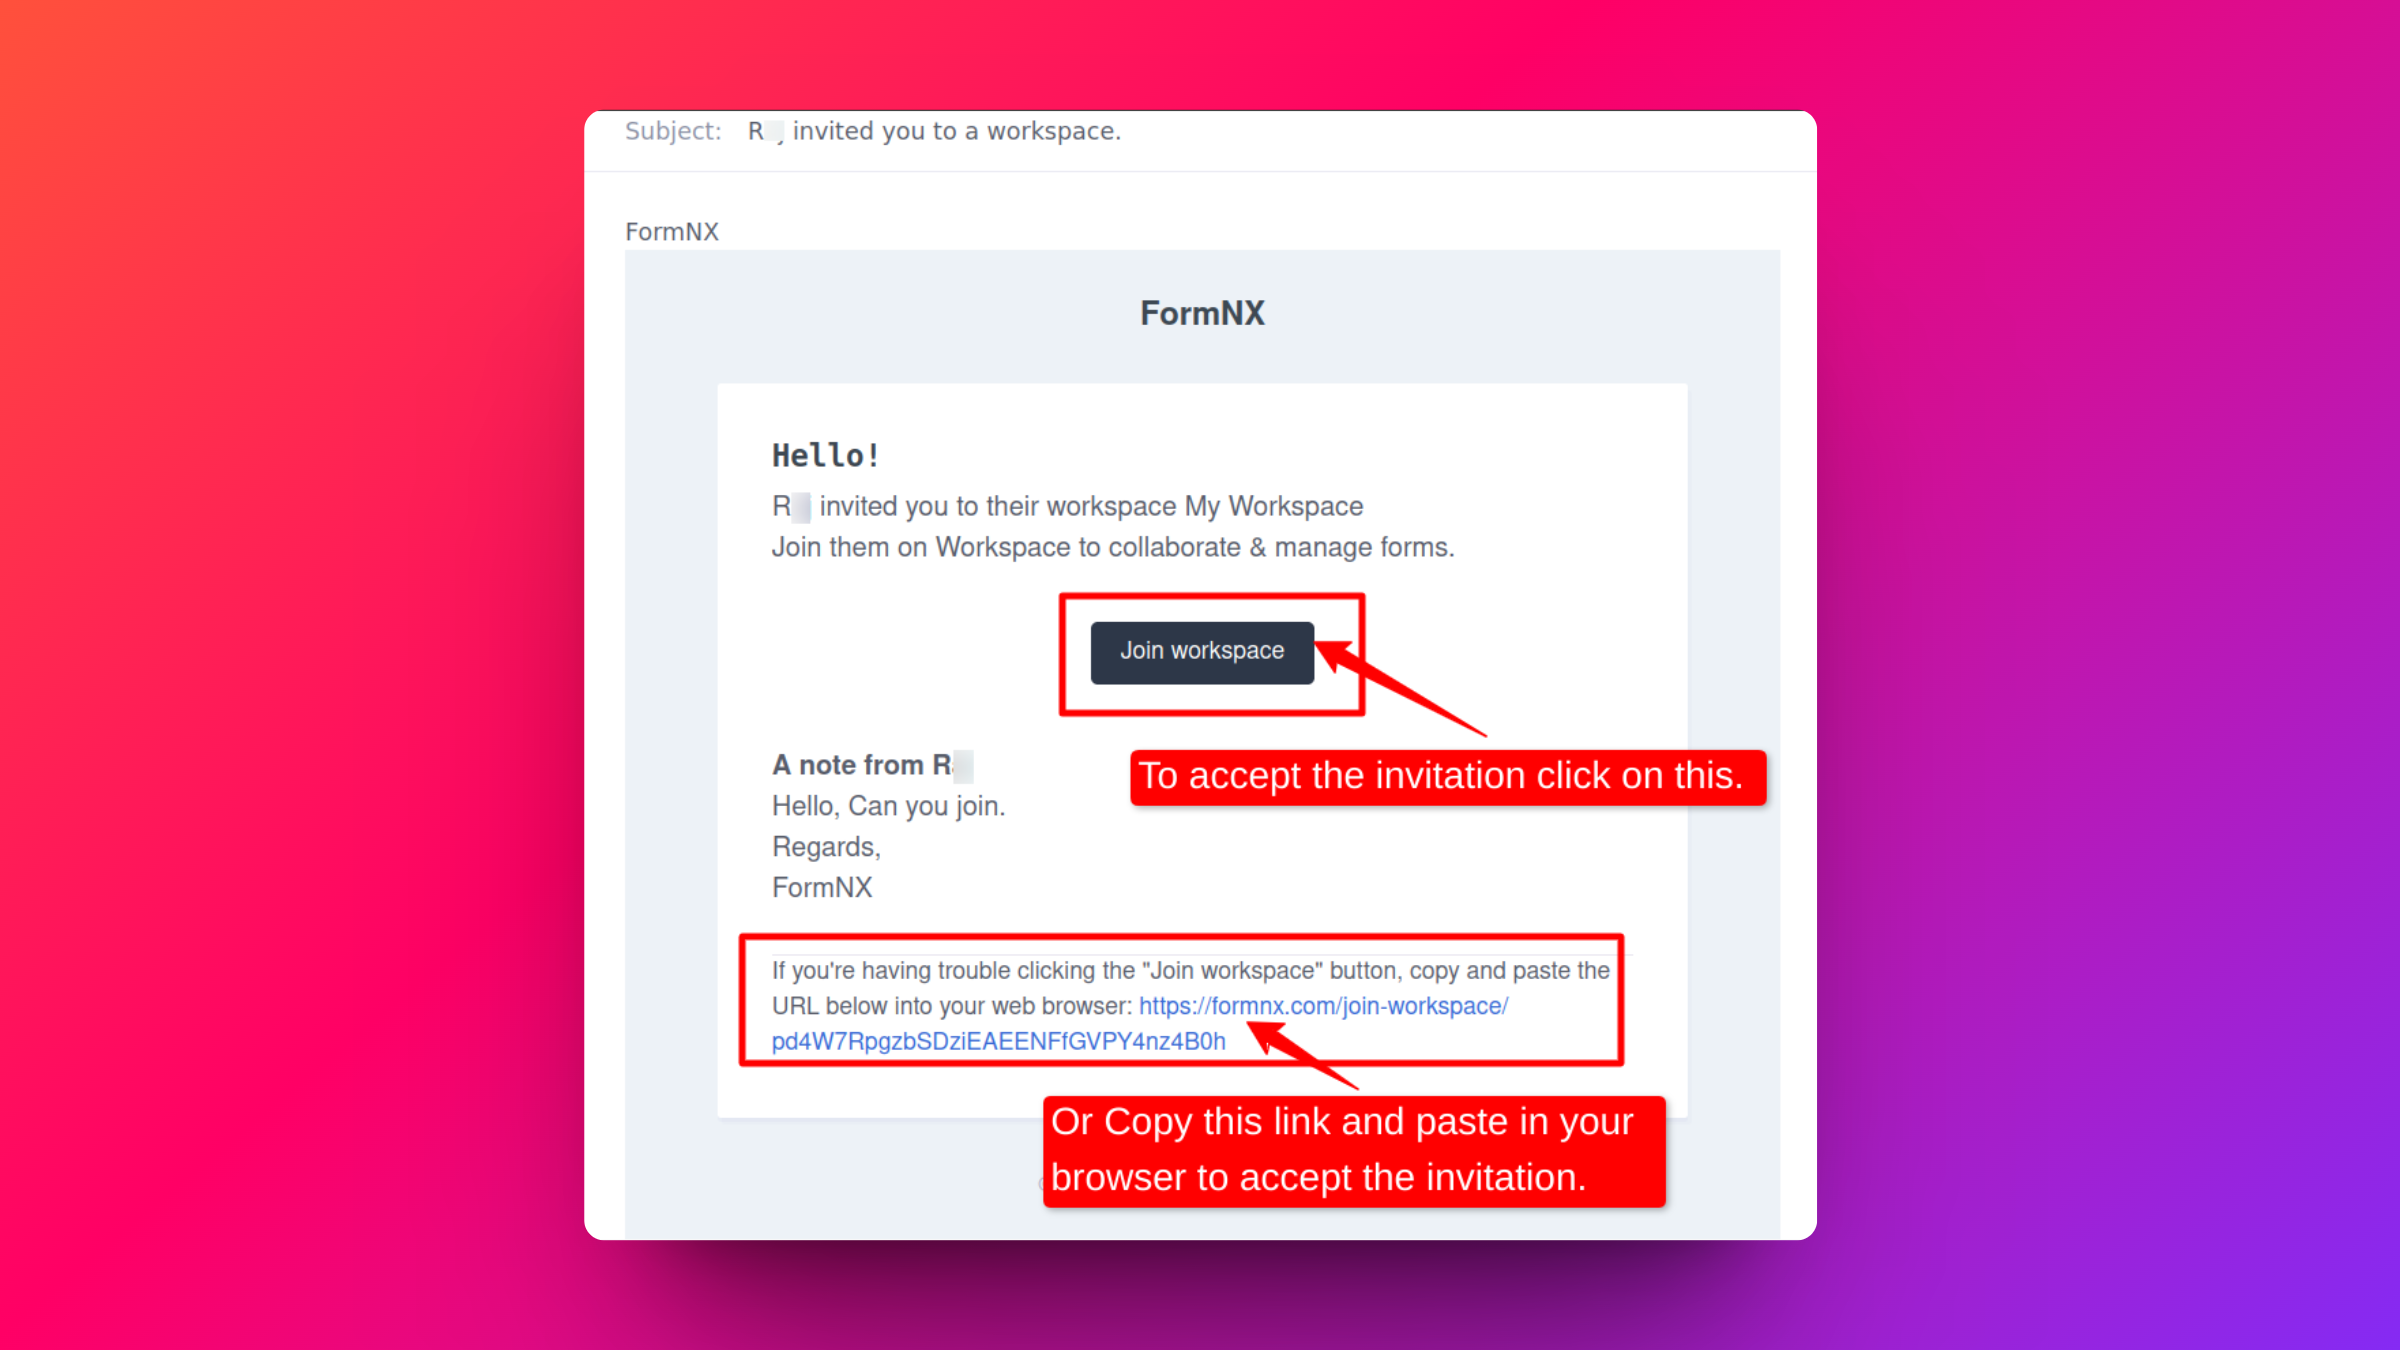
If they click on the link that they receive in their email, a page will open to accept or reject the invitation.
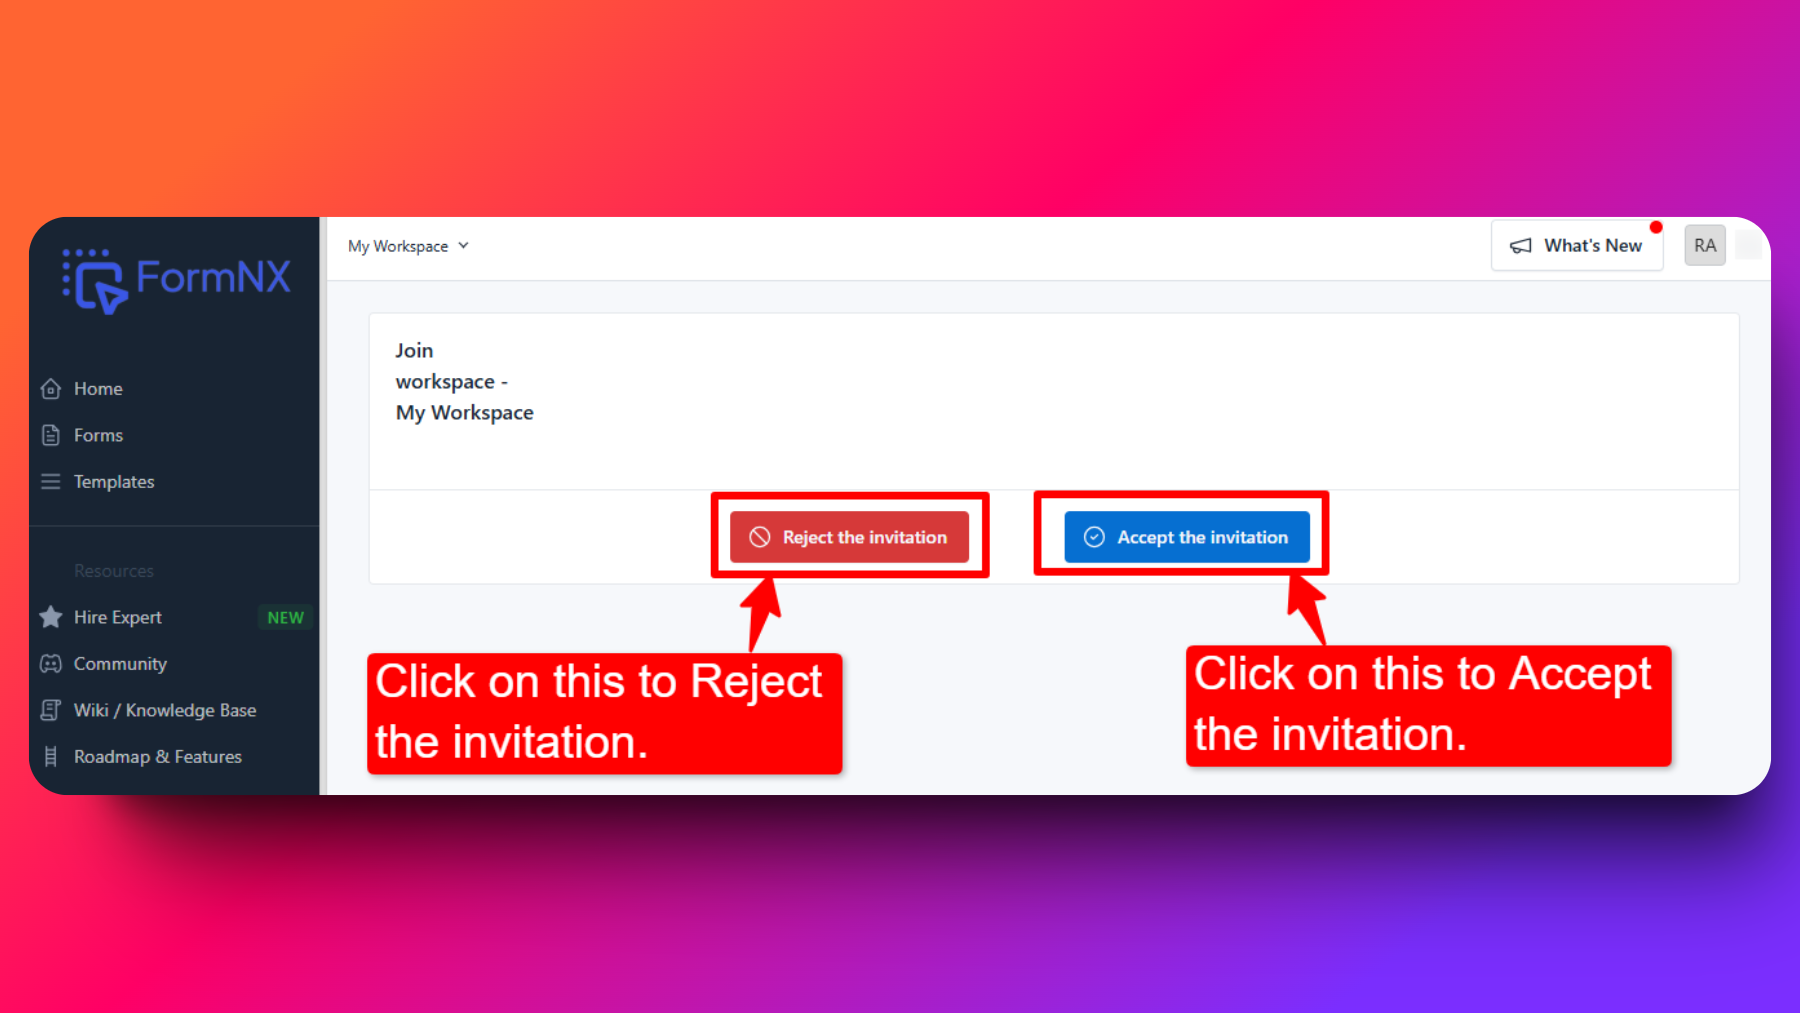 If they accept the invitation then they are added to the Workspace members list.
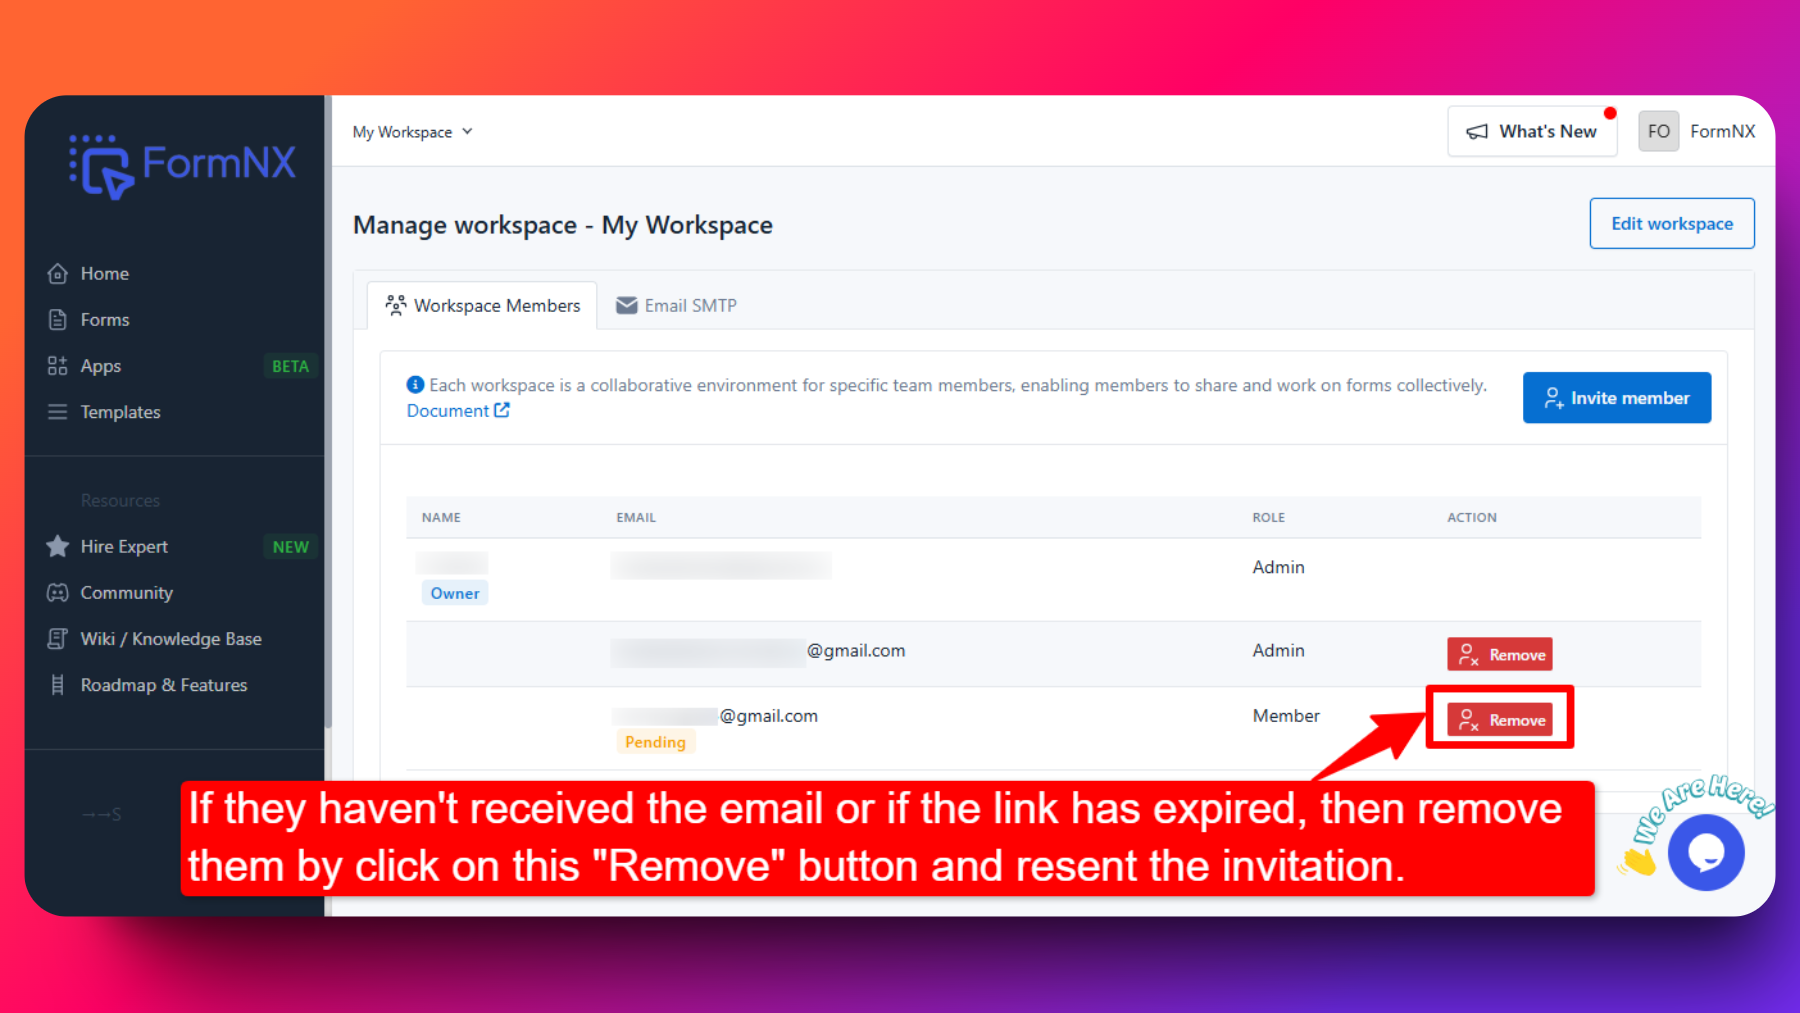
If they haven't received the email or if the link has expired, then remove them from the Workspace members list and resent the invitation.
Please make sure to follow these steps to join the workspace:
- Make sure you're logged in to FormNX using the same email where you received the invitation to join the Workspace.
- After logging in, go to your email and click on the "Join Workspace" button in the workspace invitation email using the same browser.
- You'll be asked for confirmation. Simply click on "Accept the invitation" to join the workspace.
- Once joined, you'll see the list of workspaces in the top left corner. Switch to the Workspace to start using it.
If you still cannot join the workspace after following these steps, it may be because the link has expired. Please ask your owner or admin to resend the invitation link.
Managing Existing Workspaces
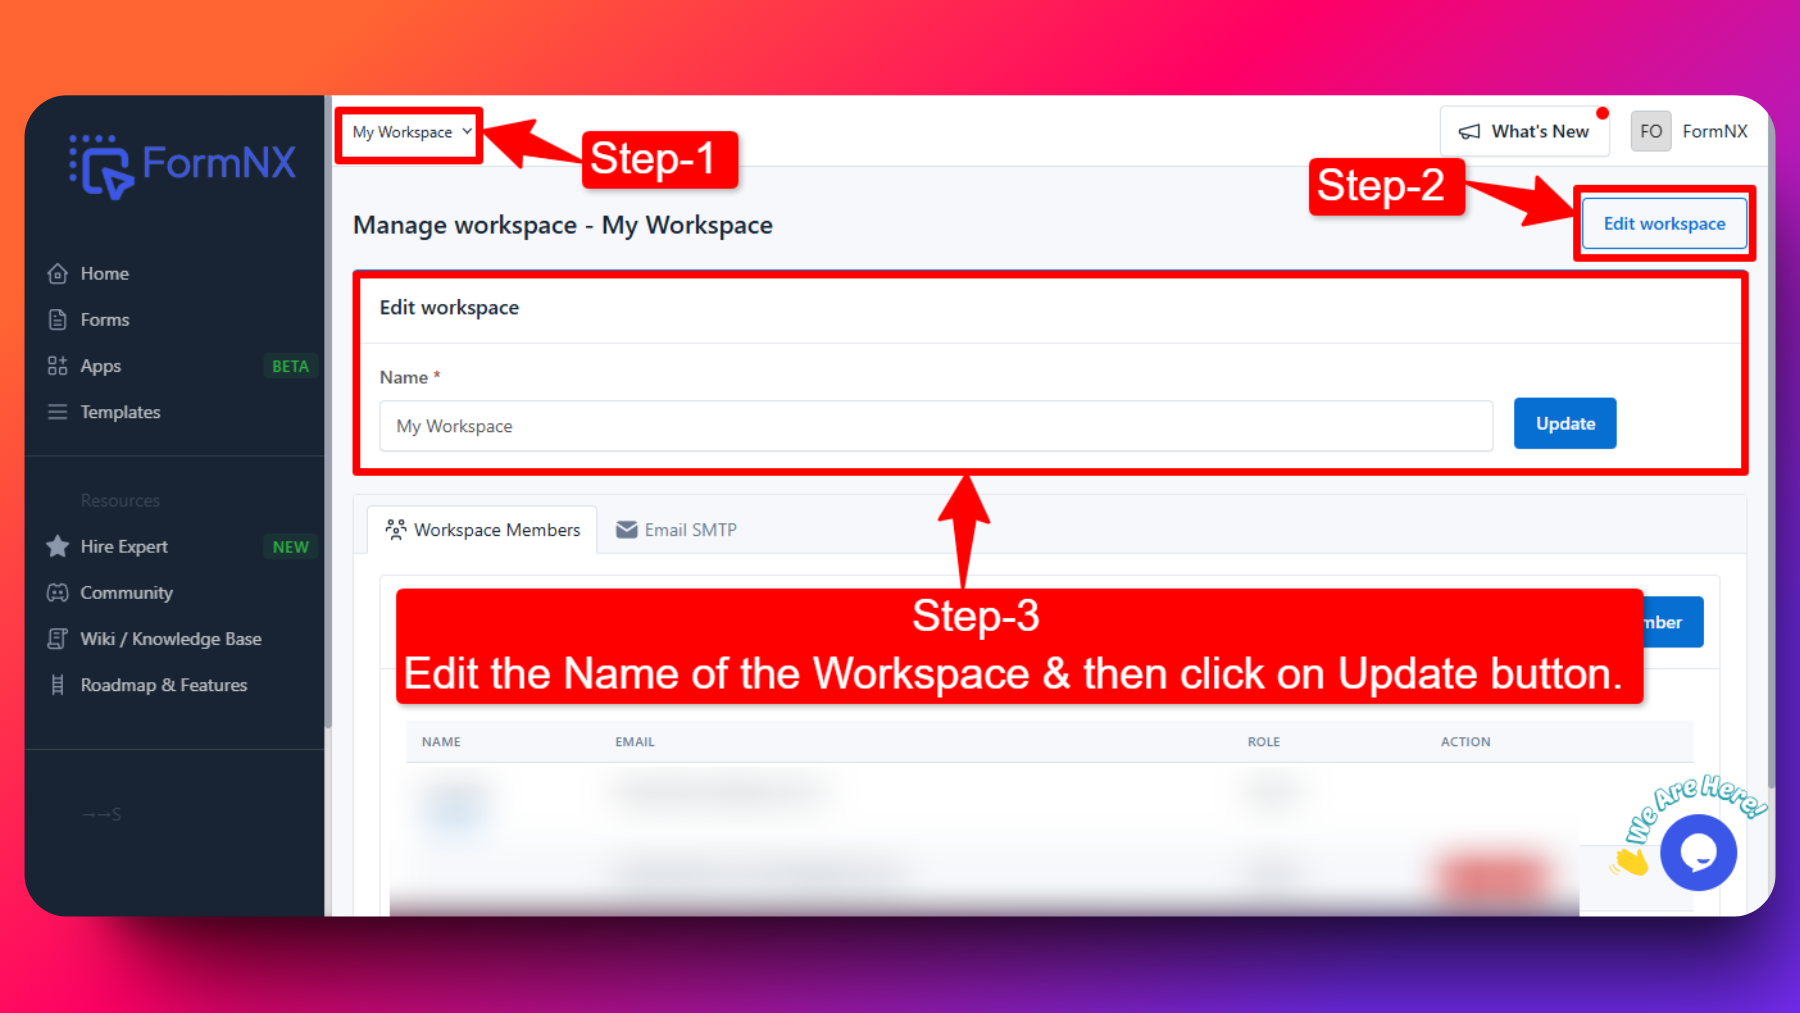
Access Workspace Management: Log in to your FormNX account and navigate to the workspace management section.
Edit Workspace: Select the workspace you want to manage and click on "Edit Workspace" option to update it's name.
Workspace Members Roles and Permissions
FormNX workspaces offer three different roles, each with specific permissions:
Admin: Admins have full control over the workspace. They can create, edit, and delete forms, manage workspace settings, invite members, and more.
Member: Members have most privileges but cannot add or remove members from the workspace. They can create, edit, and delete forms & get access to all form submission within the workspace.
Viewer: Viewers have limited access and can only view forms and submissions. They cannot edit forms or access workspace settings.
Common Use Cases
Workspaces are designed for teams that need to keep work separated by function or client. The most common setups we see:
- HR teams — separate workspaces for HR, Recruiting, and Payroll, each with role-based access so a recruiter does not see exit interviews or compensation changes. See our HR forms toolkit for the full lifecycle setup.
- Agencies — one workspace per client so submissions stay isolated and a single team member can be added to only the clients they work on.
- Multi-brand companies — one workspace per brand so logos, custom domains, and form styling do not bleed across brands.
Switching Between Workspaces
Users can easily switch between different workspaces within FormNX:
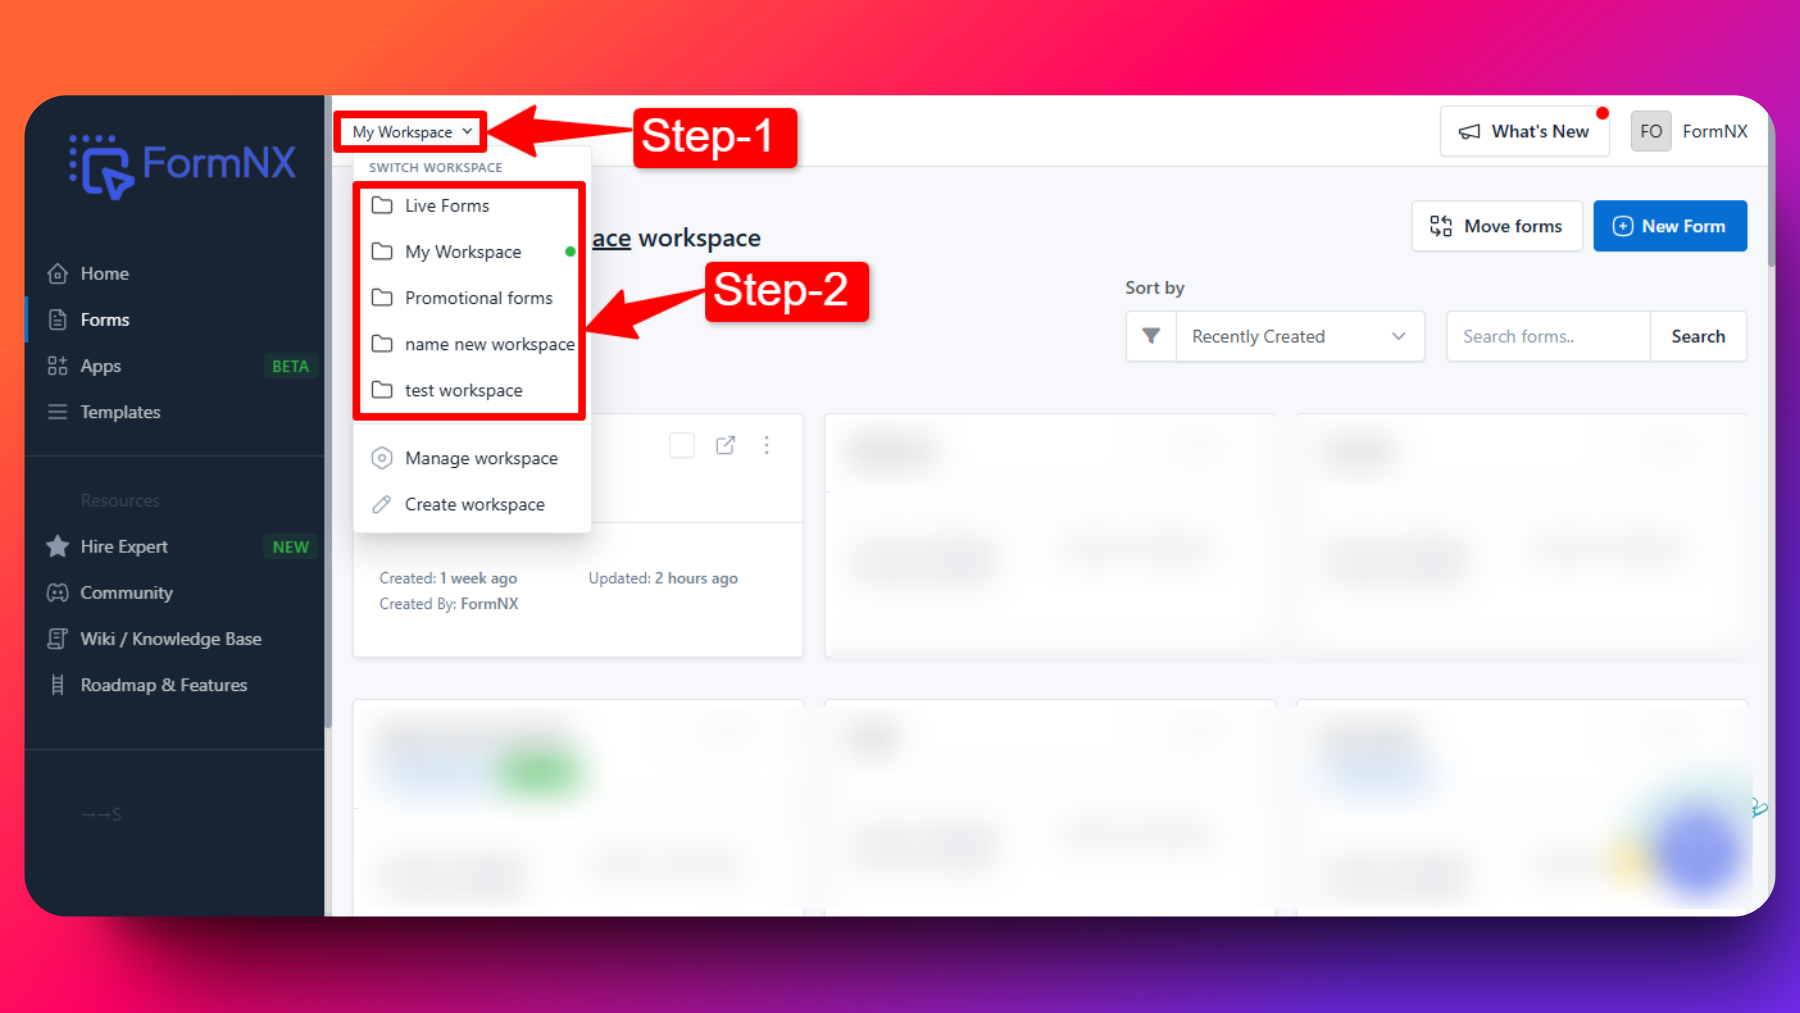
Click on "My Workspace" in the navigation menu.
Select the desired workspace name from the dropdown menu. This allows users to access and work within different workspaces as needed.
Removing Workspace Members
As an admin, you can remove members from a workspace:
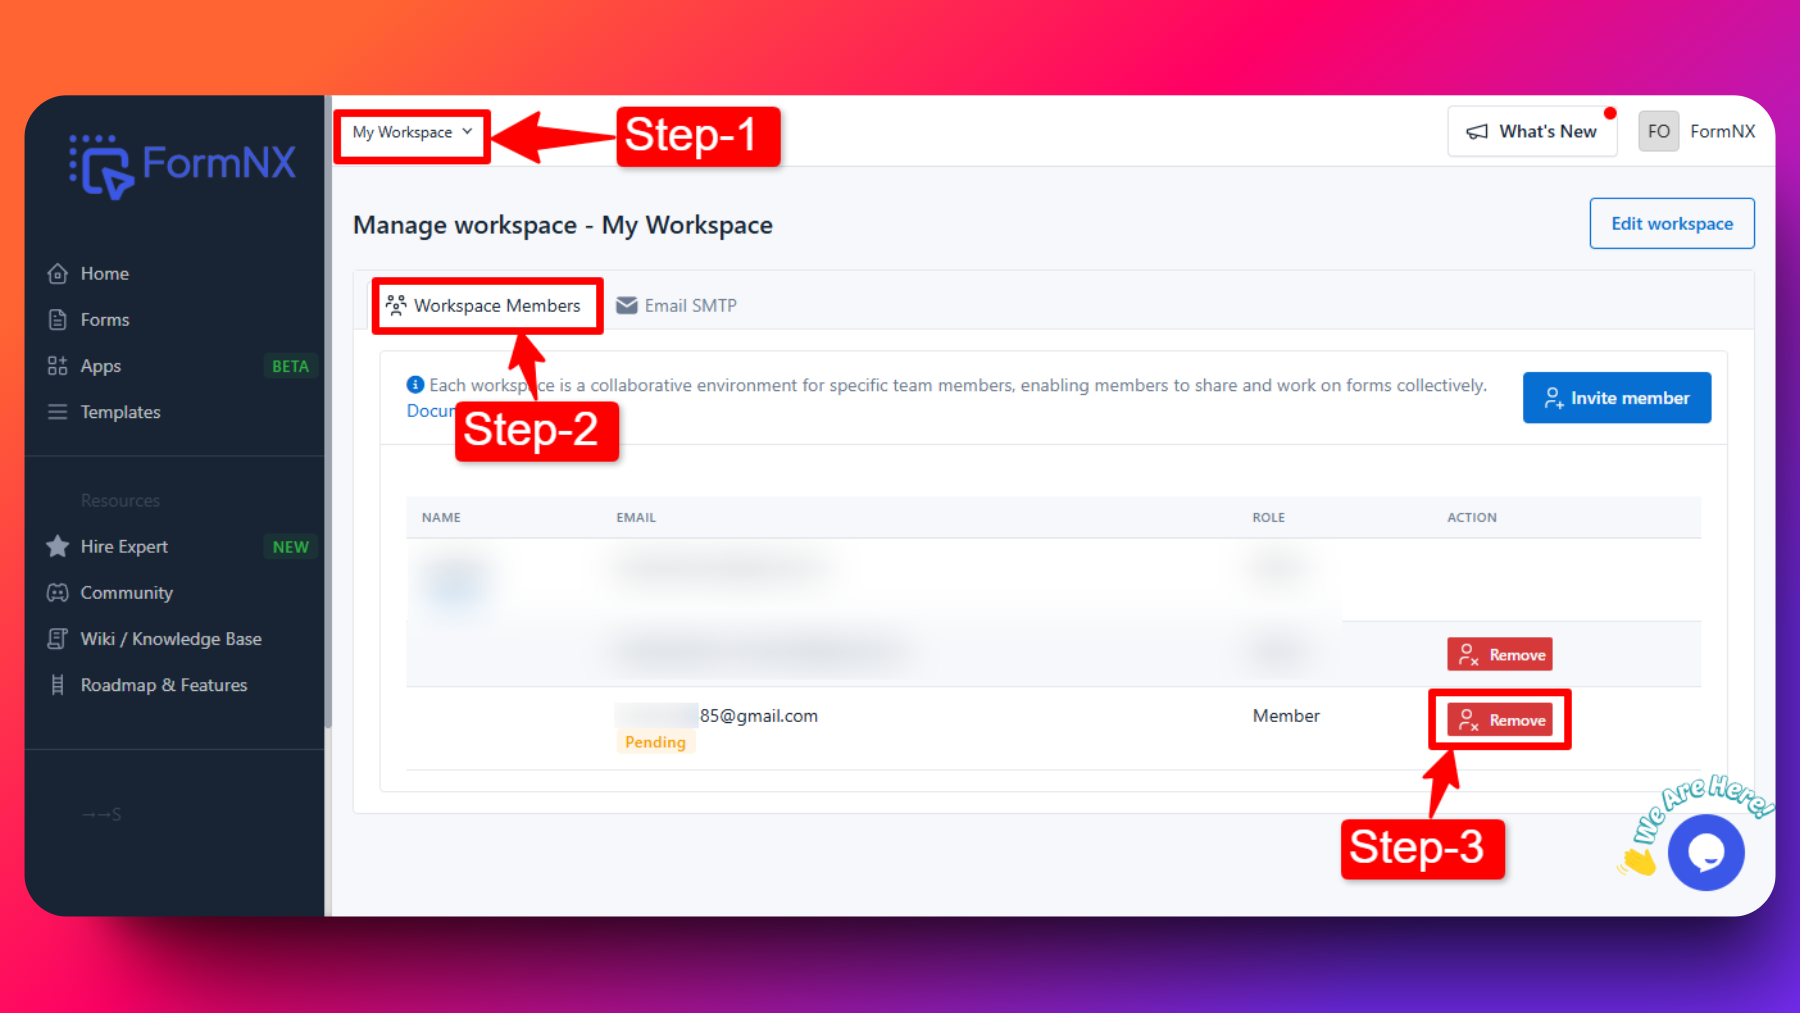
Navigate to "Manage Workspace" within the workspace settings.
Go to "Workspace Members."
Locate the member you want to remove and click on the red "Remove" button.
The member will be removed from the workspace, revoking their access and permissions. Removed member will not get any emails.
FAQs
Can I have multiple workspaces for different projects or teams?
Yes, FormNX allows you to create multiple workspaces, each tailored to specific projects, teams, or purposes.
How do I assign roles to workspace members?
When inviting members to a workspace, you can assign roles such as Admin, Member, or Viewer to each member based on their level of access and responsibility.
Can members from one workspace access another workspace's data?
No, members from one workspace cannot access another workspace's data unless they are invited to and granted access to that specific workspace.
How can I switch my current workspace?
You can switch your current workspace by clicking on "My Workspace" in the navigation menu and selecting the desired workspace from the dropdown menu.
How many workspace can i create?
It depends on your package subscription. Checkout pricing page or My Subscription for more details.
How can i know the current workspace i'm working on?
In top left side it will show the name of workspace you're currently working on.